Any Standalone node that meets the minimum requirements can be configured as a eurysco Server in order to centralize the tools and information of all the eurysco Agent nodes, extending and unlocking further functions.
Quick Configuration #
Click the Configure Server button to configure the Server role in a few simple steps.
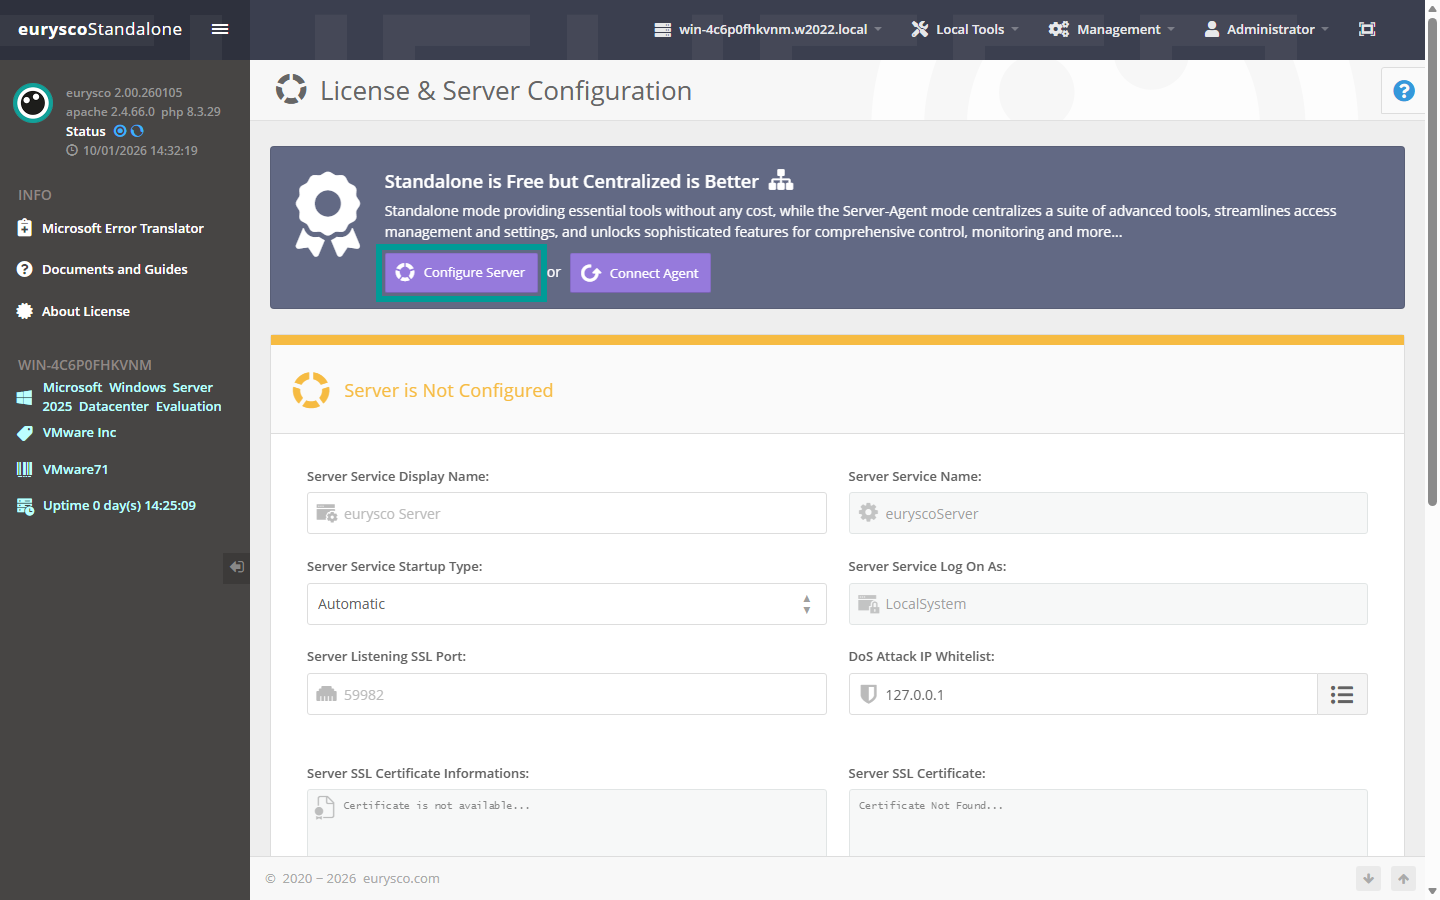
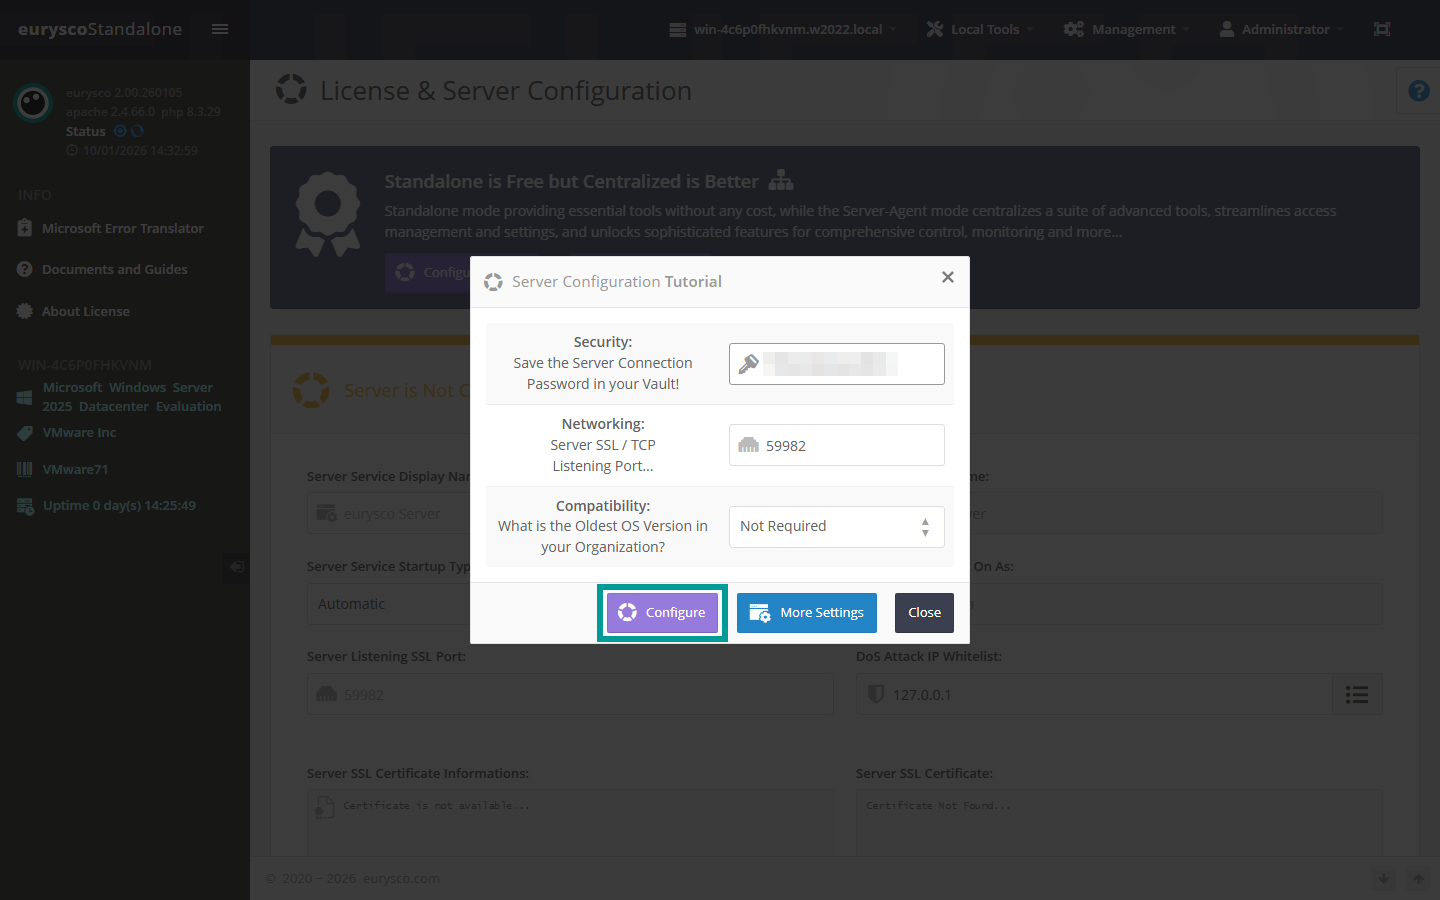
Secure the server password, set another TCP port than the default if necessary, select the desired backward compatibility level and click on the Configure button.
Skip directly to the License Configuration chapter.
Server Configuration #
Below are the steps required to configure the Server role with all available options.
-
Server Configuration Interface #
Open the Server configuration interface from the Management – Server Configuration menu.

-
Server Listening SSL Port #
By default, the TCP network port of the Server service is 59982. You can set the field with alternative network TCP port.

-
Server Protocol Version #
The Server accepts all TLS communications from version 1.0 to version 1.3 to ensure compatibility from obsolete to recent systems. eurysco nodes on recent systems will still communicate in HTTP/2 but it is possible to set the Server to accept only modern protocols.

-
Server Password #
Part of the eurysco Server authentication takes place by default with an extremely long and complex password, but it is possible to extend it with a personalized password by typing it in the Server Password field to further increase the level of security. It is recommended to always set it in the case of a production eurysco infrastructure.

-
Create Server #
Click on the Create Server button after completing all the necessary fields, which will initially start with a Demo license. With the Demo license the Agent-Server communication will be limited to itself. It will be necessary to configure the Agent as suggested by the warning message.

Agent Configuration #
The Server Agent service must be configured and active towards itself.
-
Agent Configuration Interface #
Open the Agent configuration interface from the Management – Agent Configuration menu.

-
Server Connection Password #
If previously set, set the Server Connection Password field correctly.

-
Create Agent #
Click on the Create Agent button after completing all the necessary fields and check that the Connected status appears in the Server Connection Result field.

License Configuration #
Below are the steps to activate the license and unlock all the features.
-
Open License Configuration #
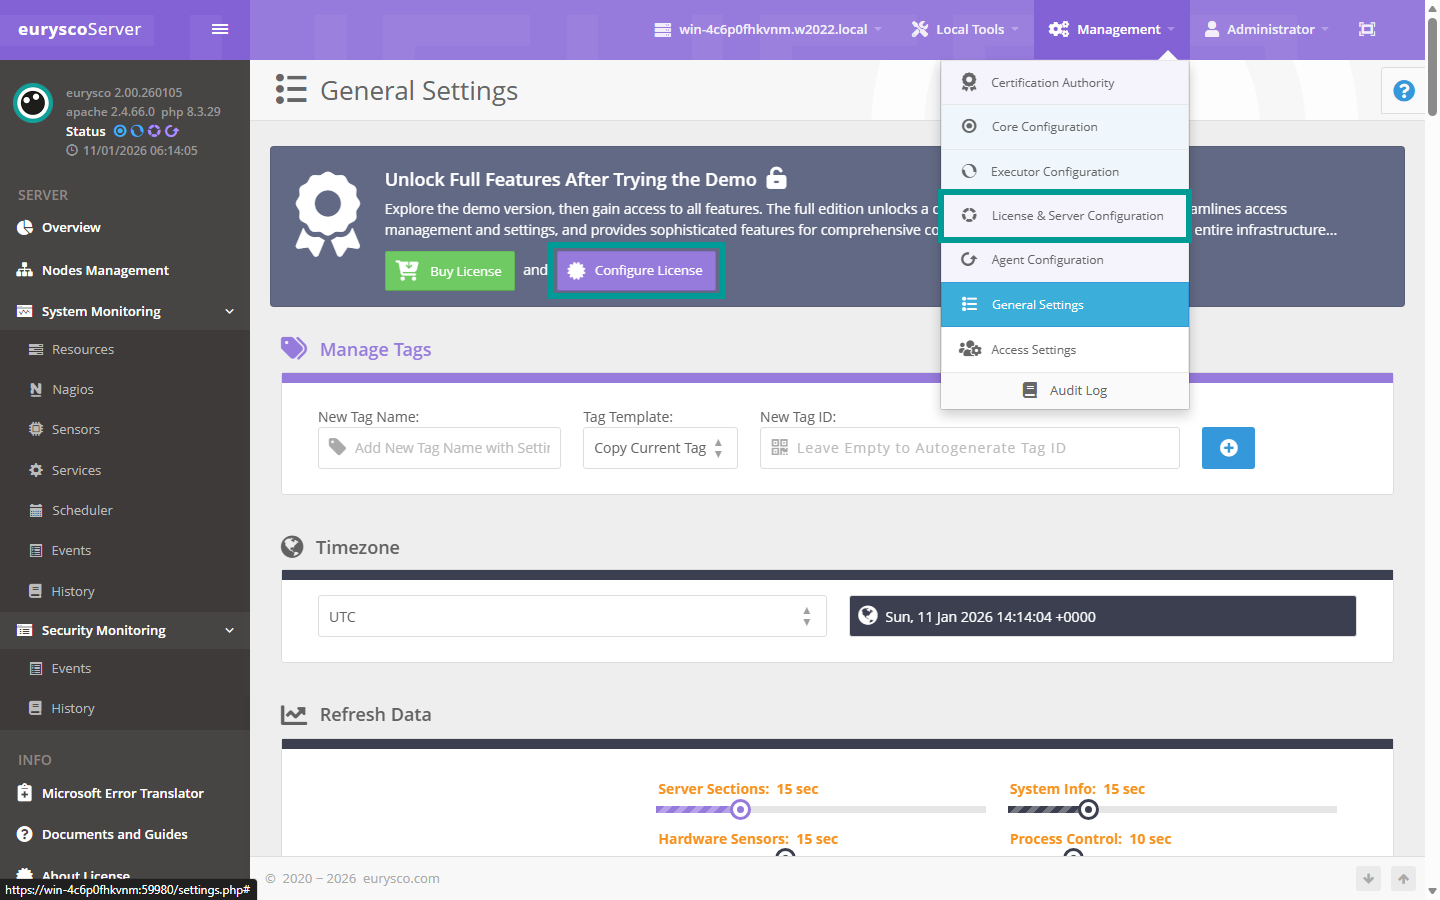
Click on Configure License or on the Management – License & Server Configuration item.
-
License Configuration Interface #
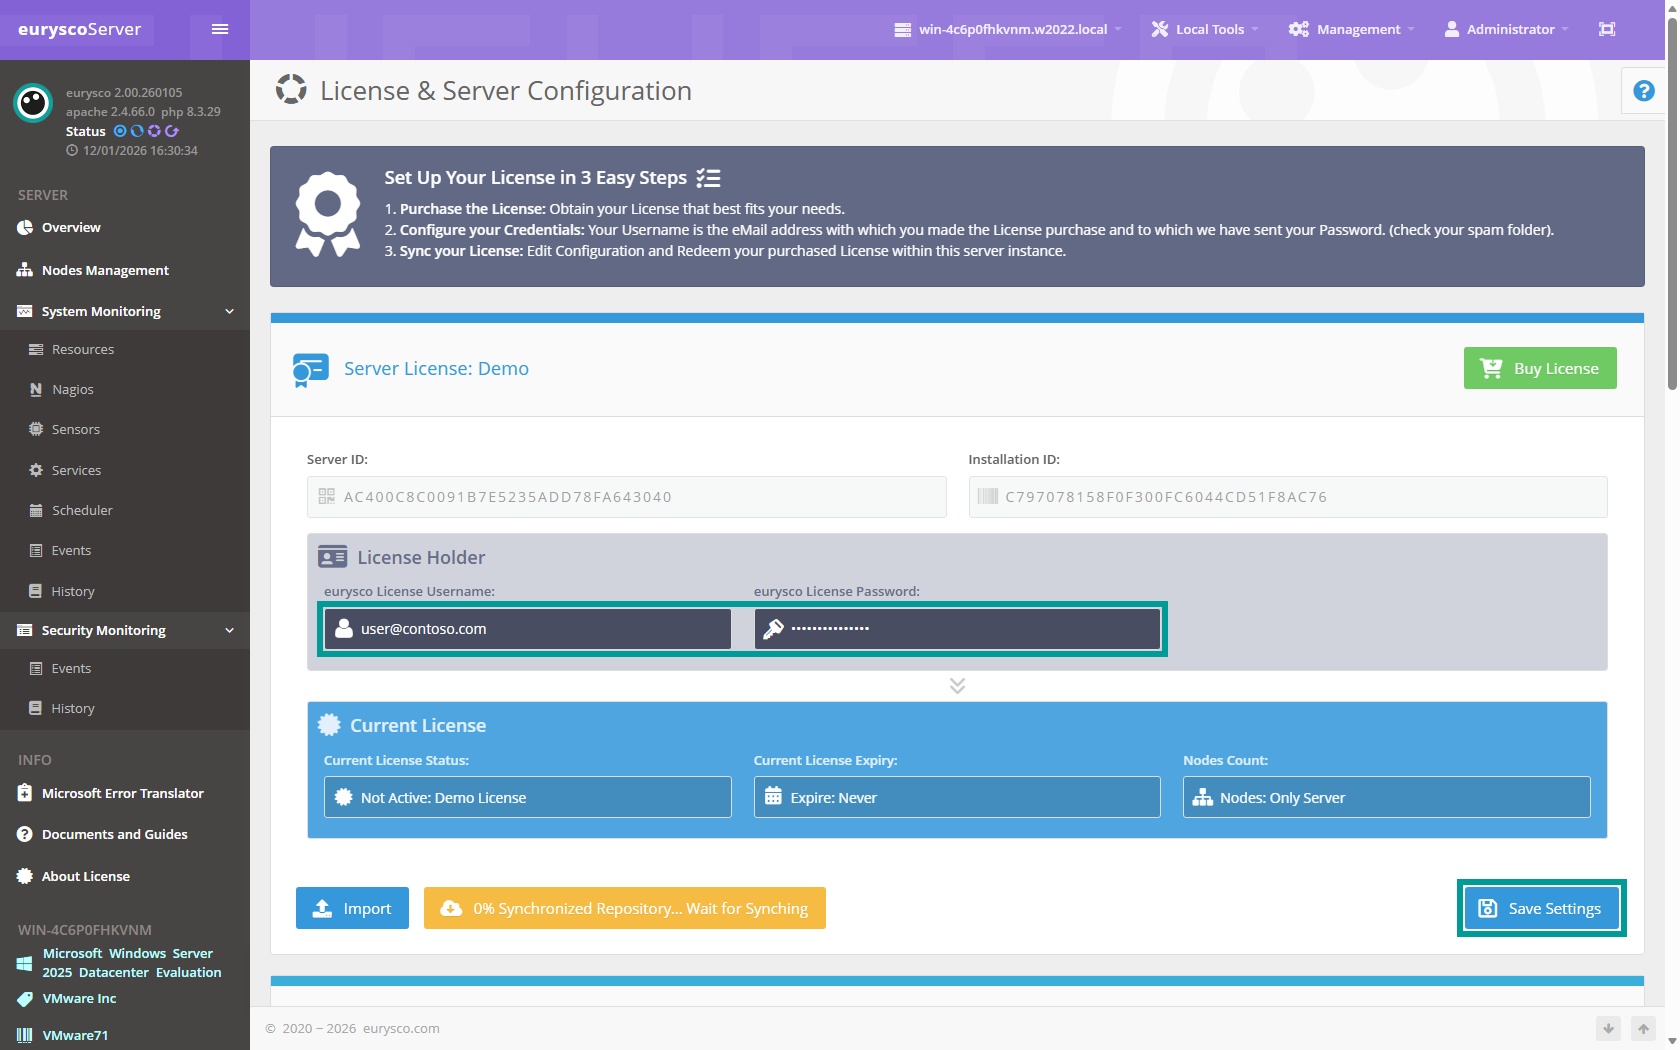
Fill the eurysco License Username and eurysco License Password fields with the credentials provided during the purchase.
-
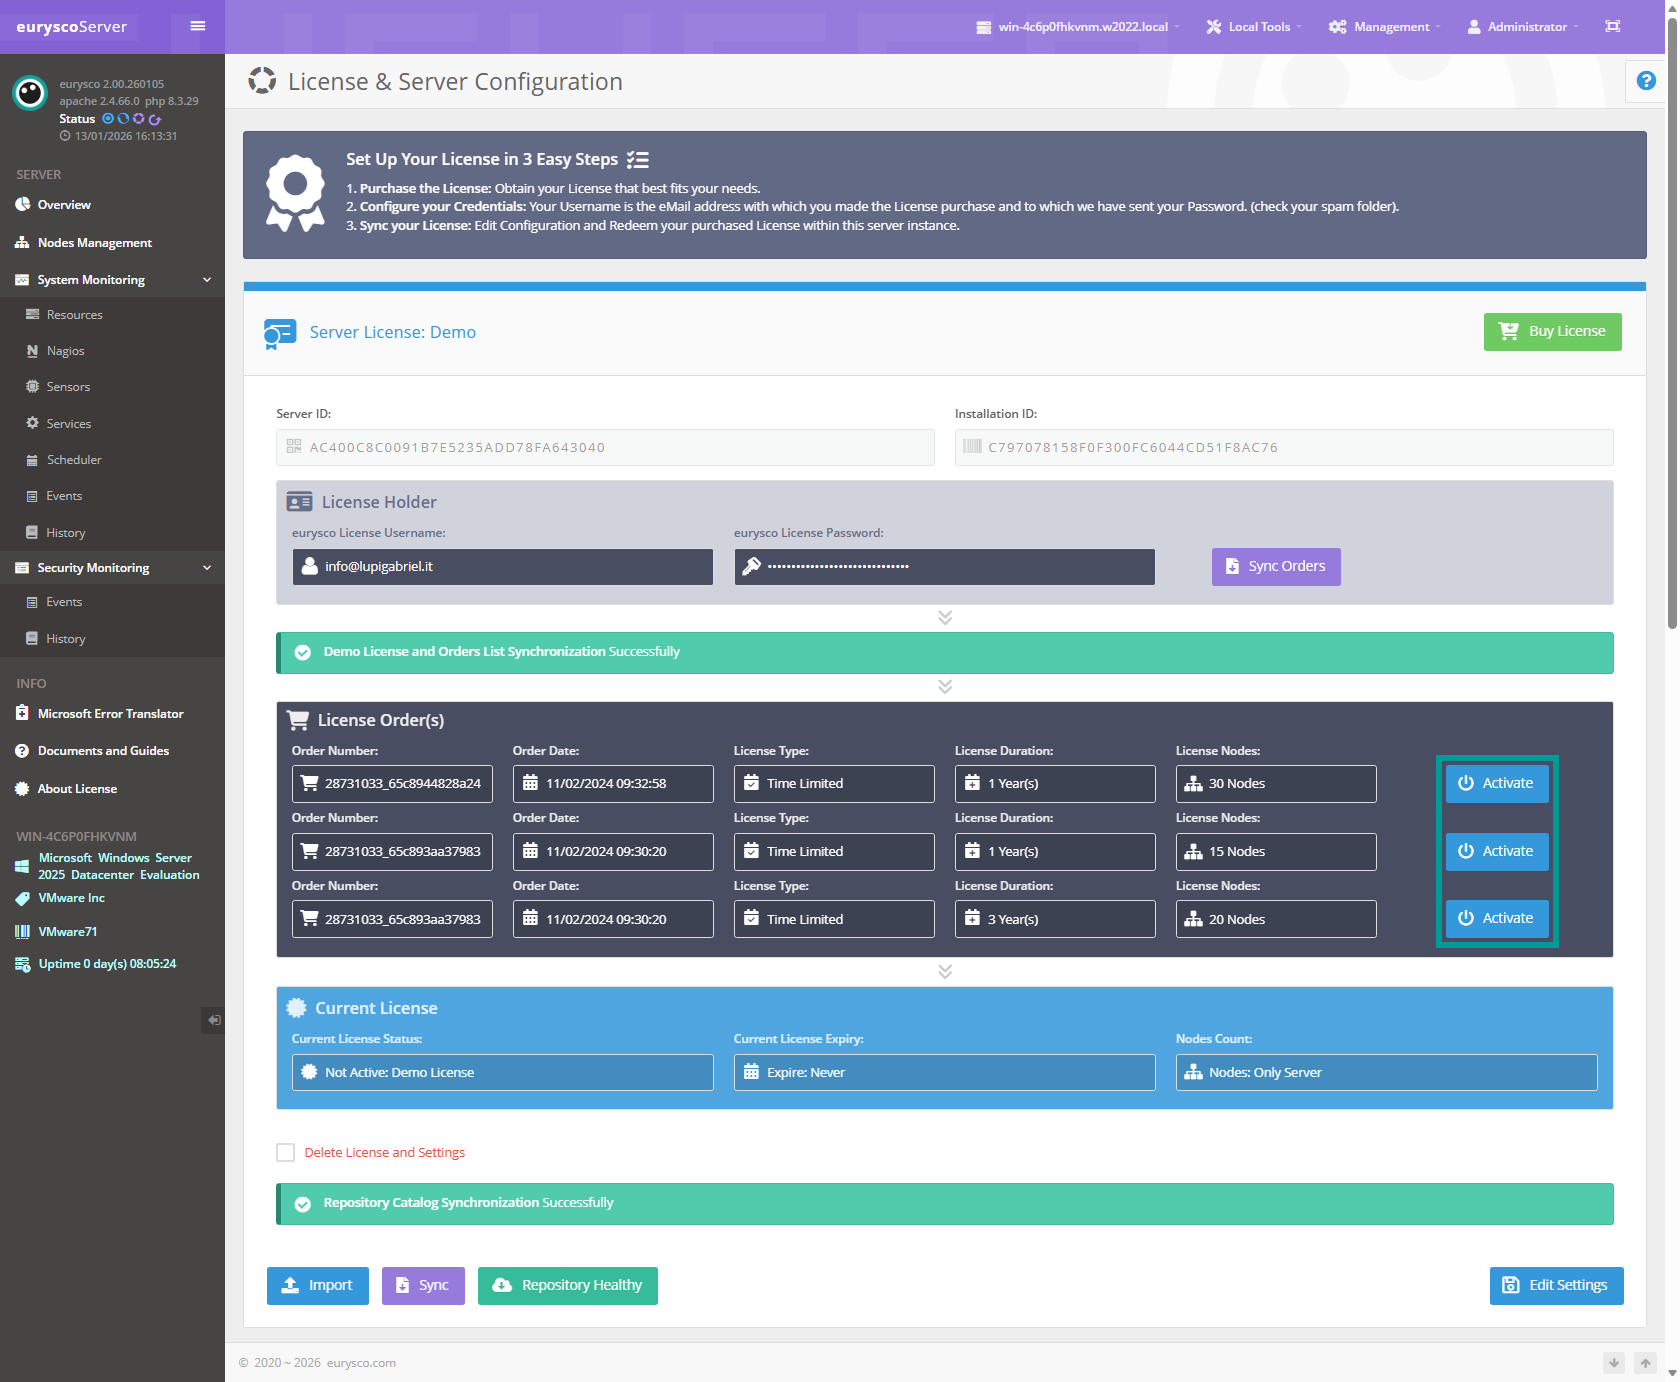
License Management #
Saving your settings will synchronize your license purchase orders. Click the Activate button for the license you want to activate.
-
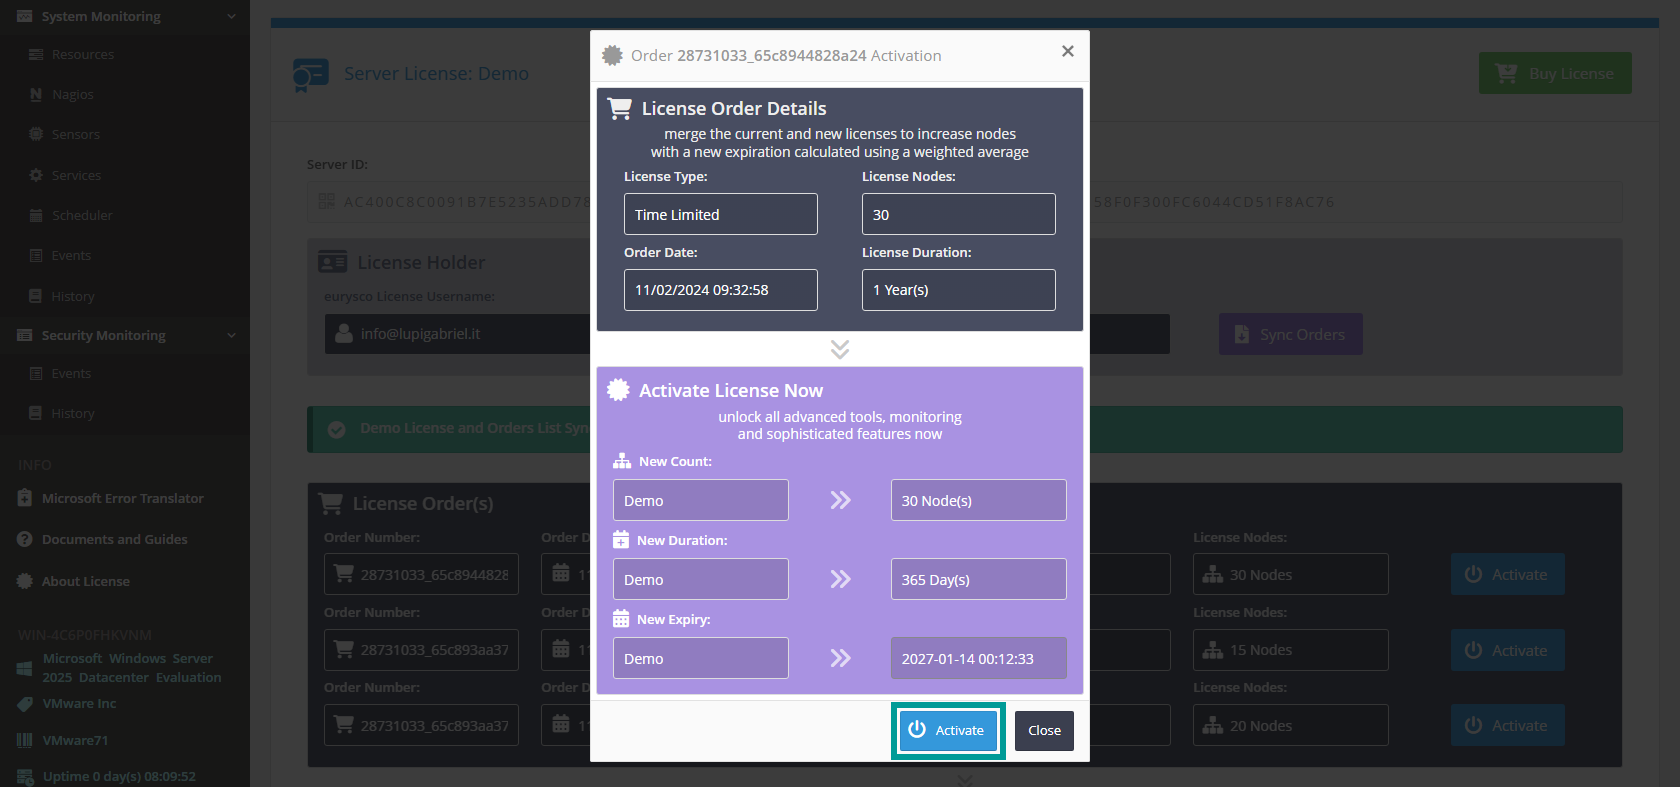
First License Activation #
This window displays the details of the license you are about to activate. Click the Activate button to activate the license.
 The activated license will appear in the purple box with details about its validity status and available usage. From the dashboard, you can manage additional licenses purchased by merging them with the currently active license or configuring them for automatic renewal. Click the Activate button for the additional license you wish to activate.
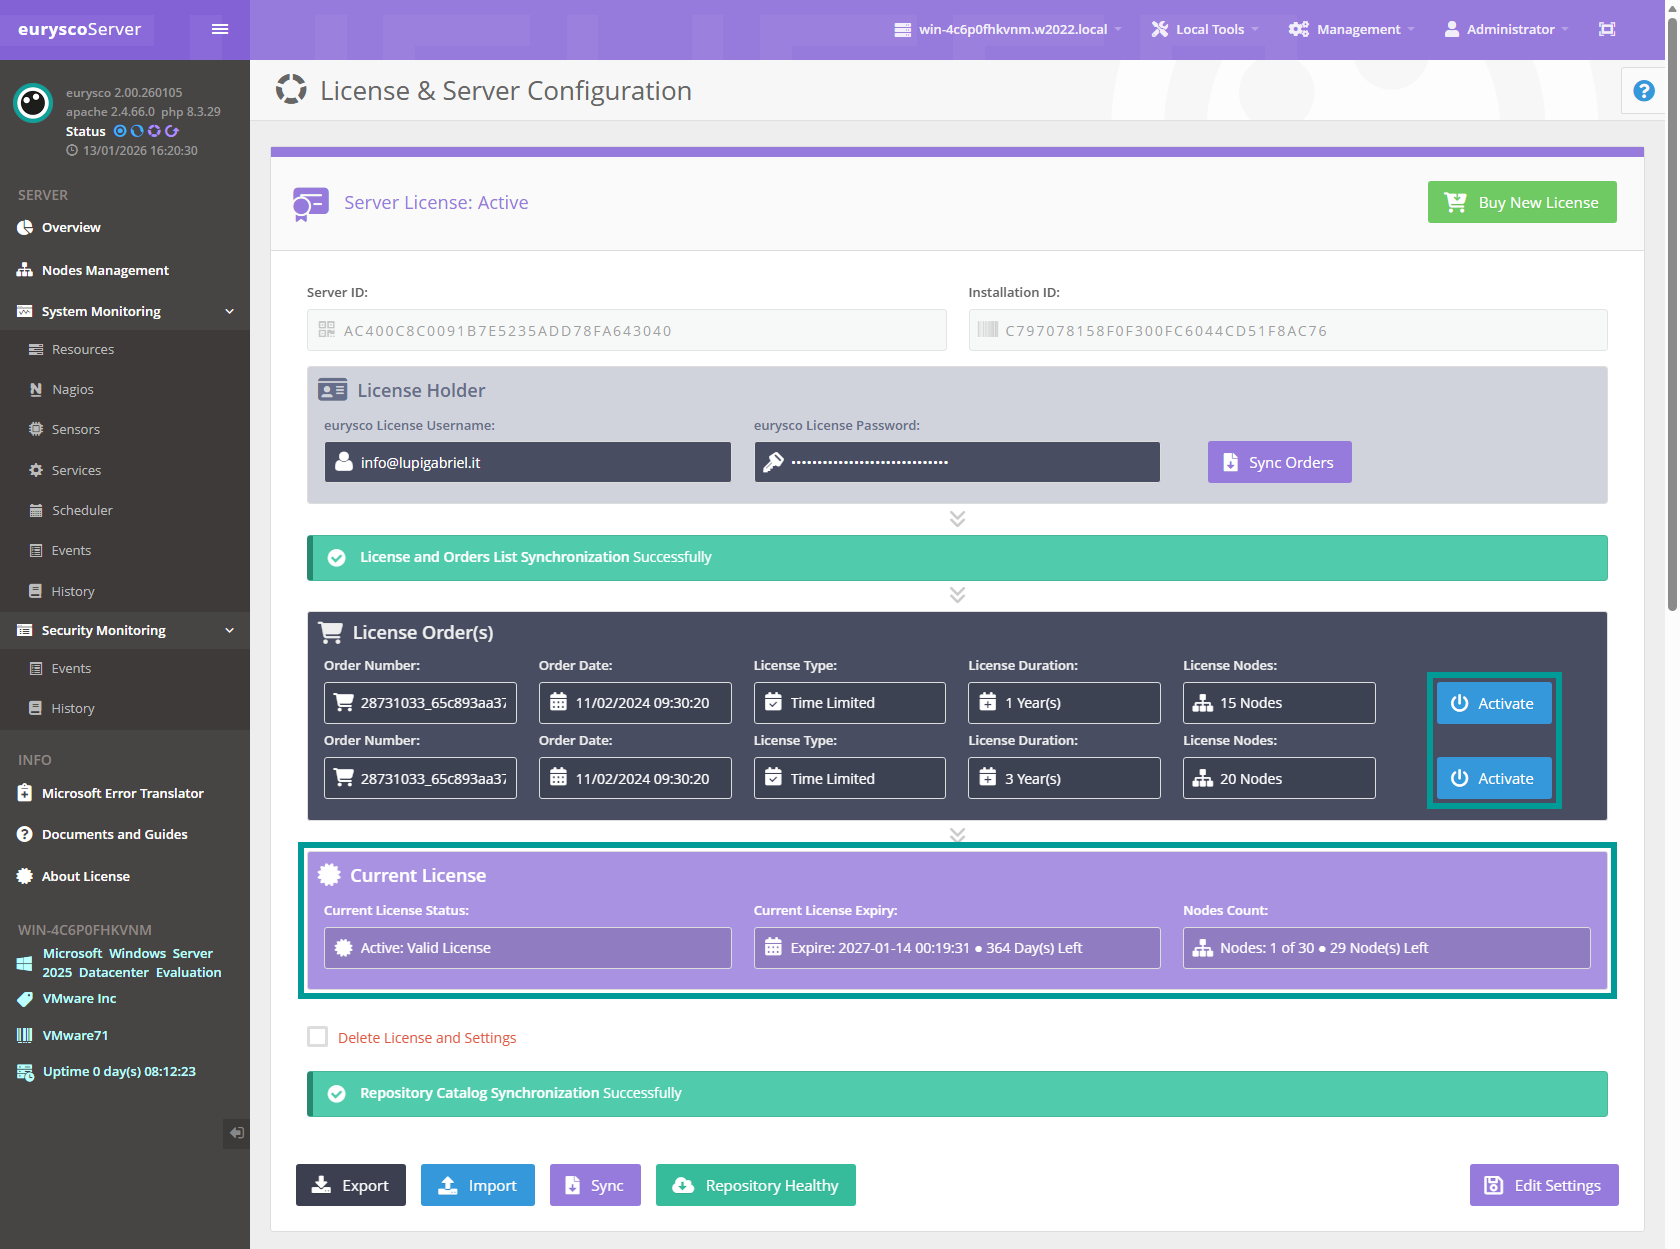
-
Automatic License Renewal #
From this window, you can view the details of the license you are about to activate, along with a button to select the activation type. Select Set as Next License and then click the Activate button to configure automatic license renewal when the current license expires.
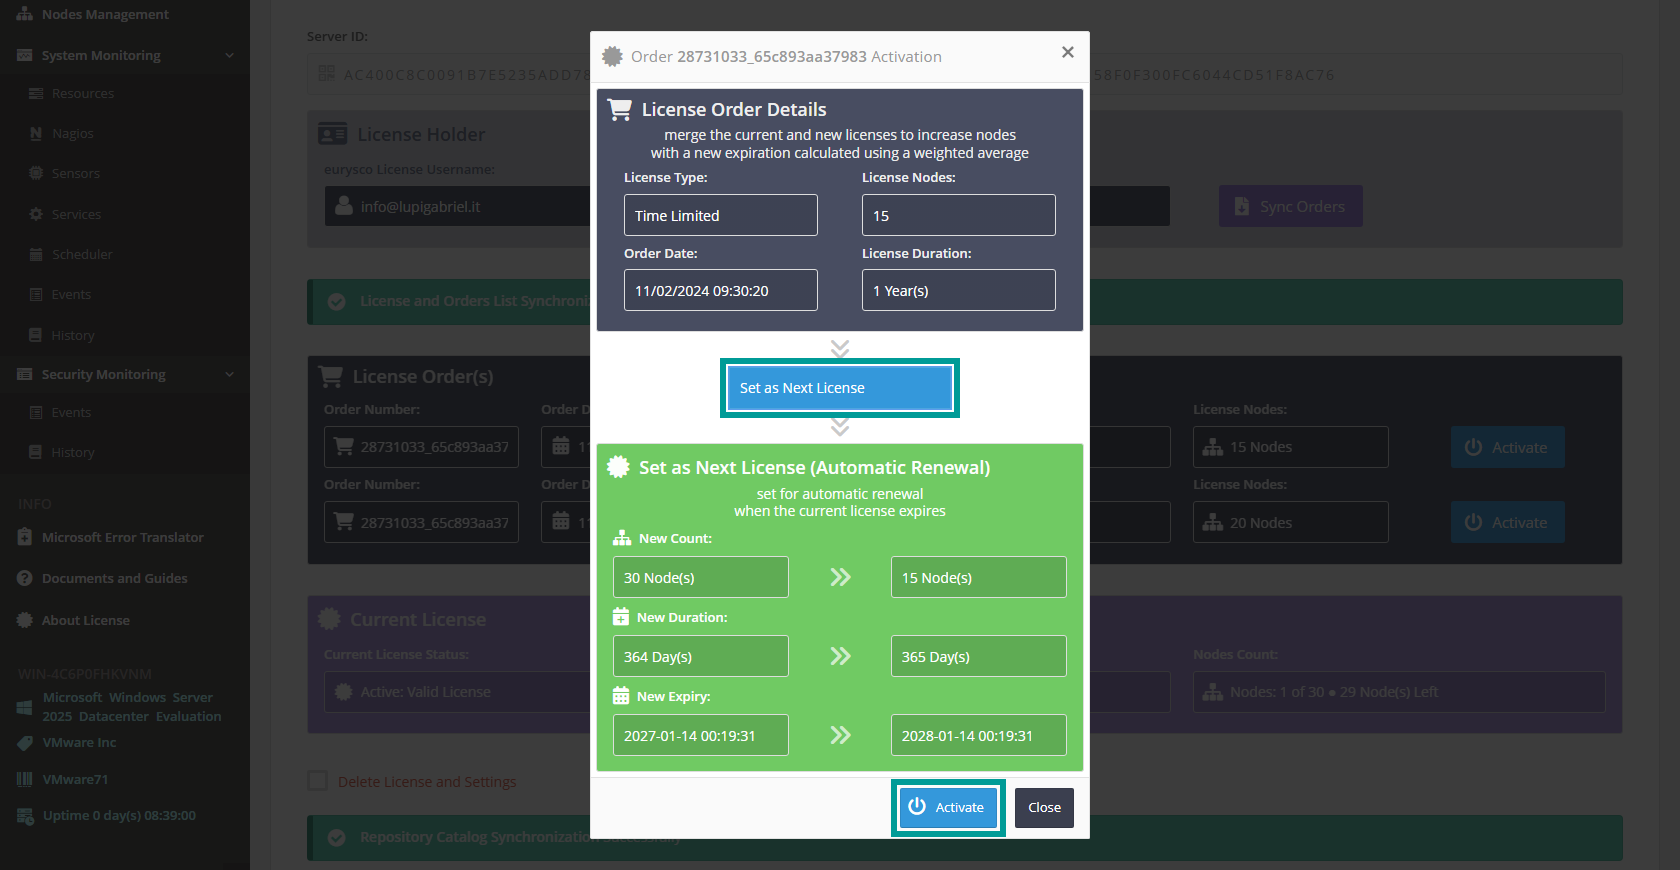 The license ready for automatic renewal will appear in the green box with the license details and its validity status.
-
Merge Licenze #
From this window, you can view the details of the license you are about to activate and click the button to select the desired activation type. Select Merge with current licenses or Merge to Next Licenze, then click the Activate button to merge the new license with the currently active license or any license configured for automatic renewal. The window will display the merge calculation and a preview of how the desired license will be updated.
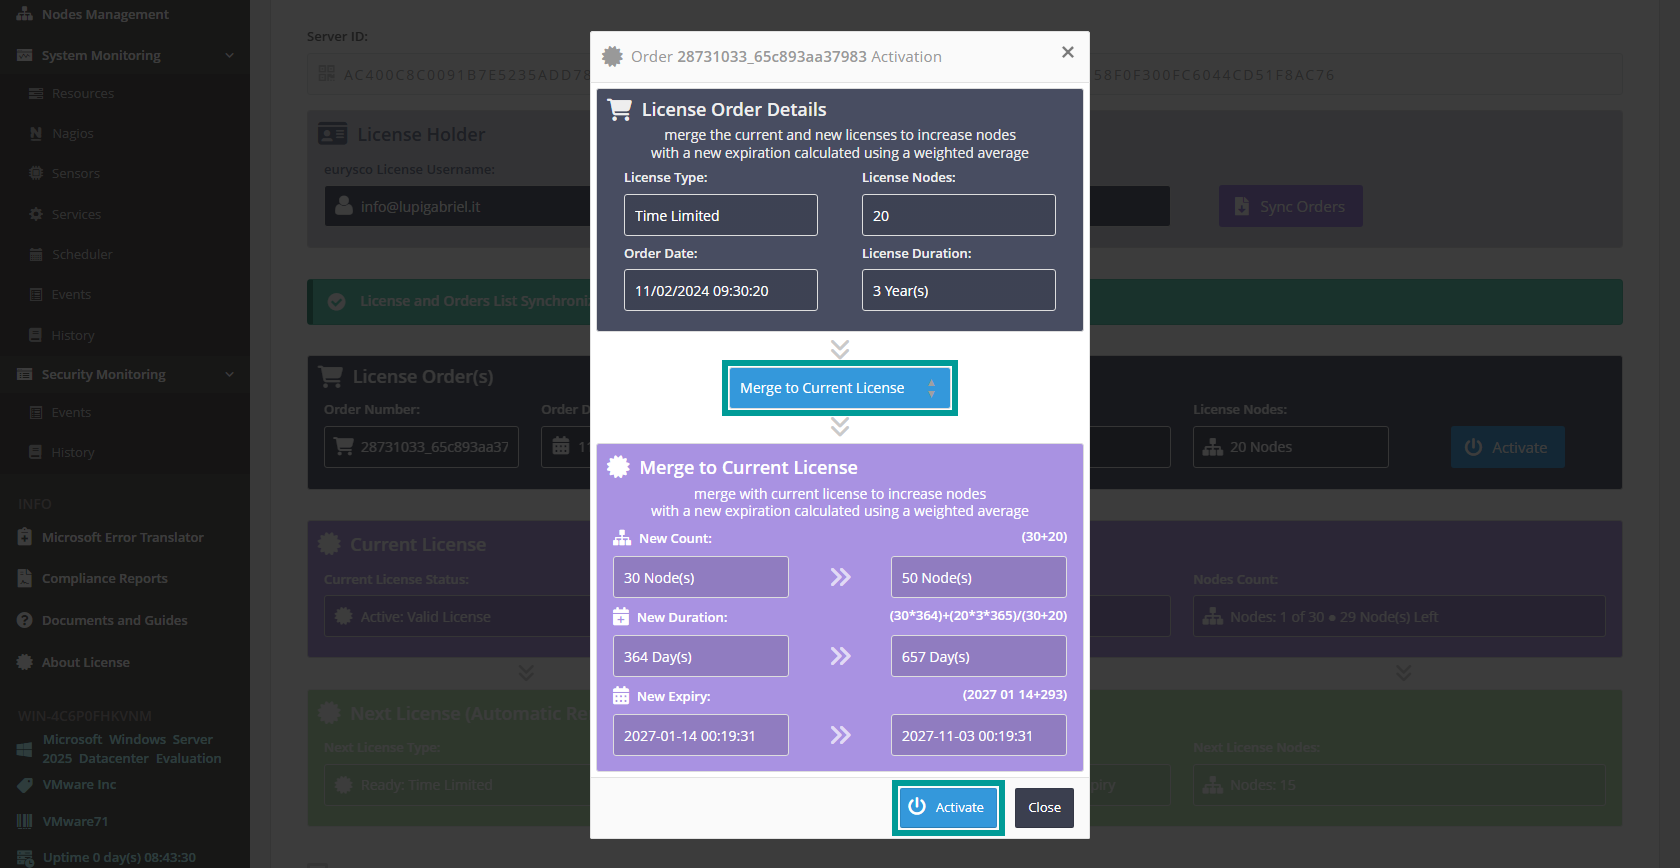 The updated license will appear in the license panel with the new details regarding the number of nodes and expiration date.
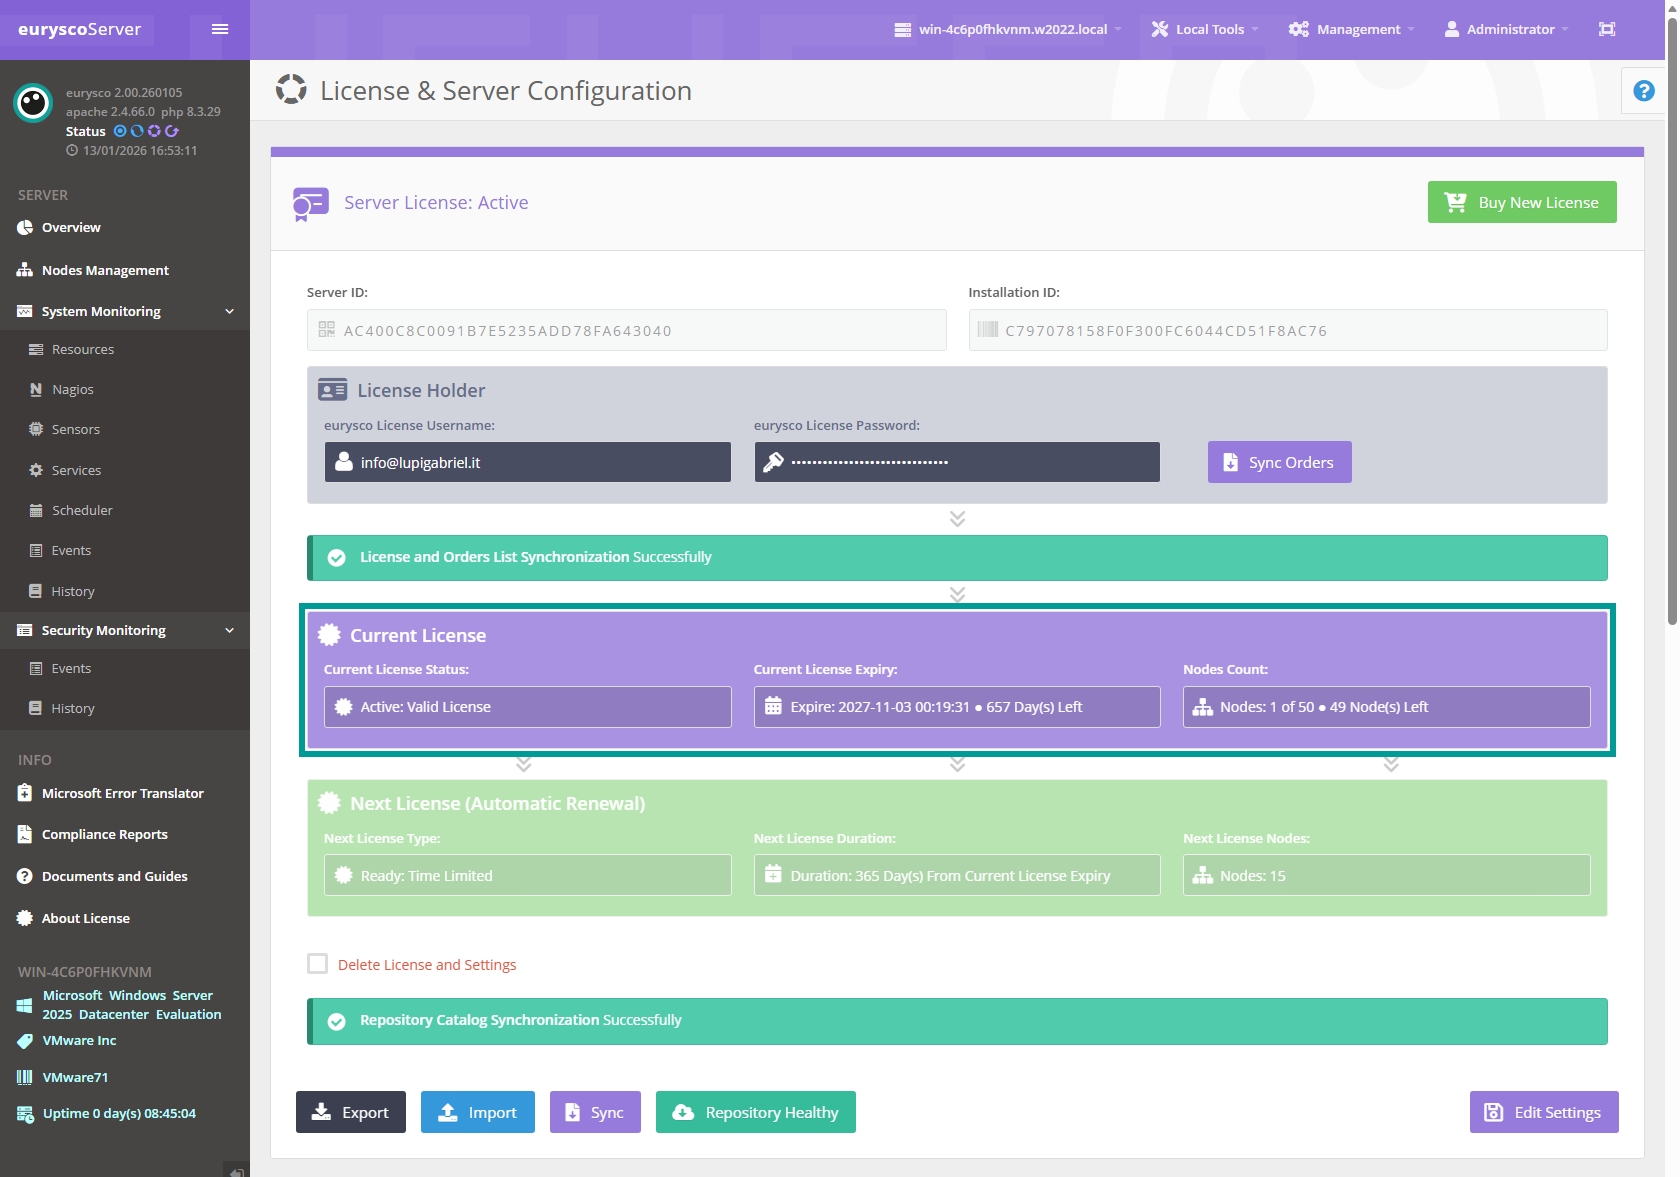
-
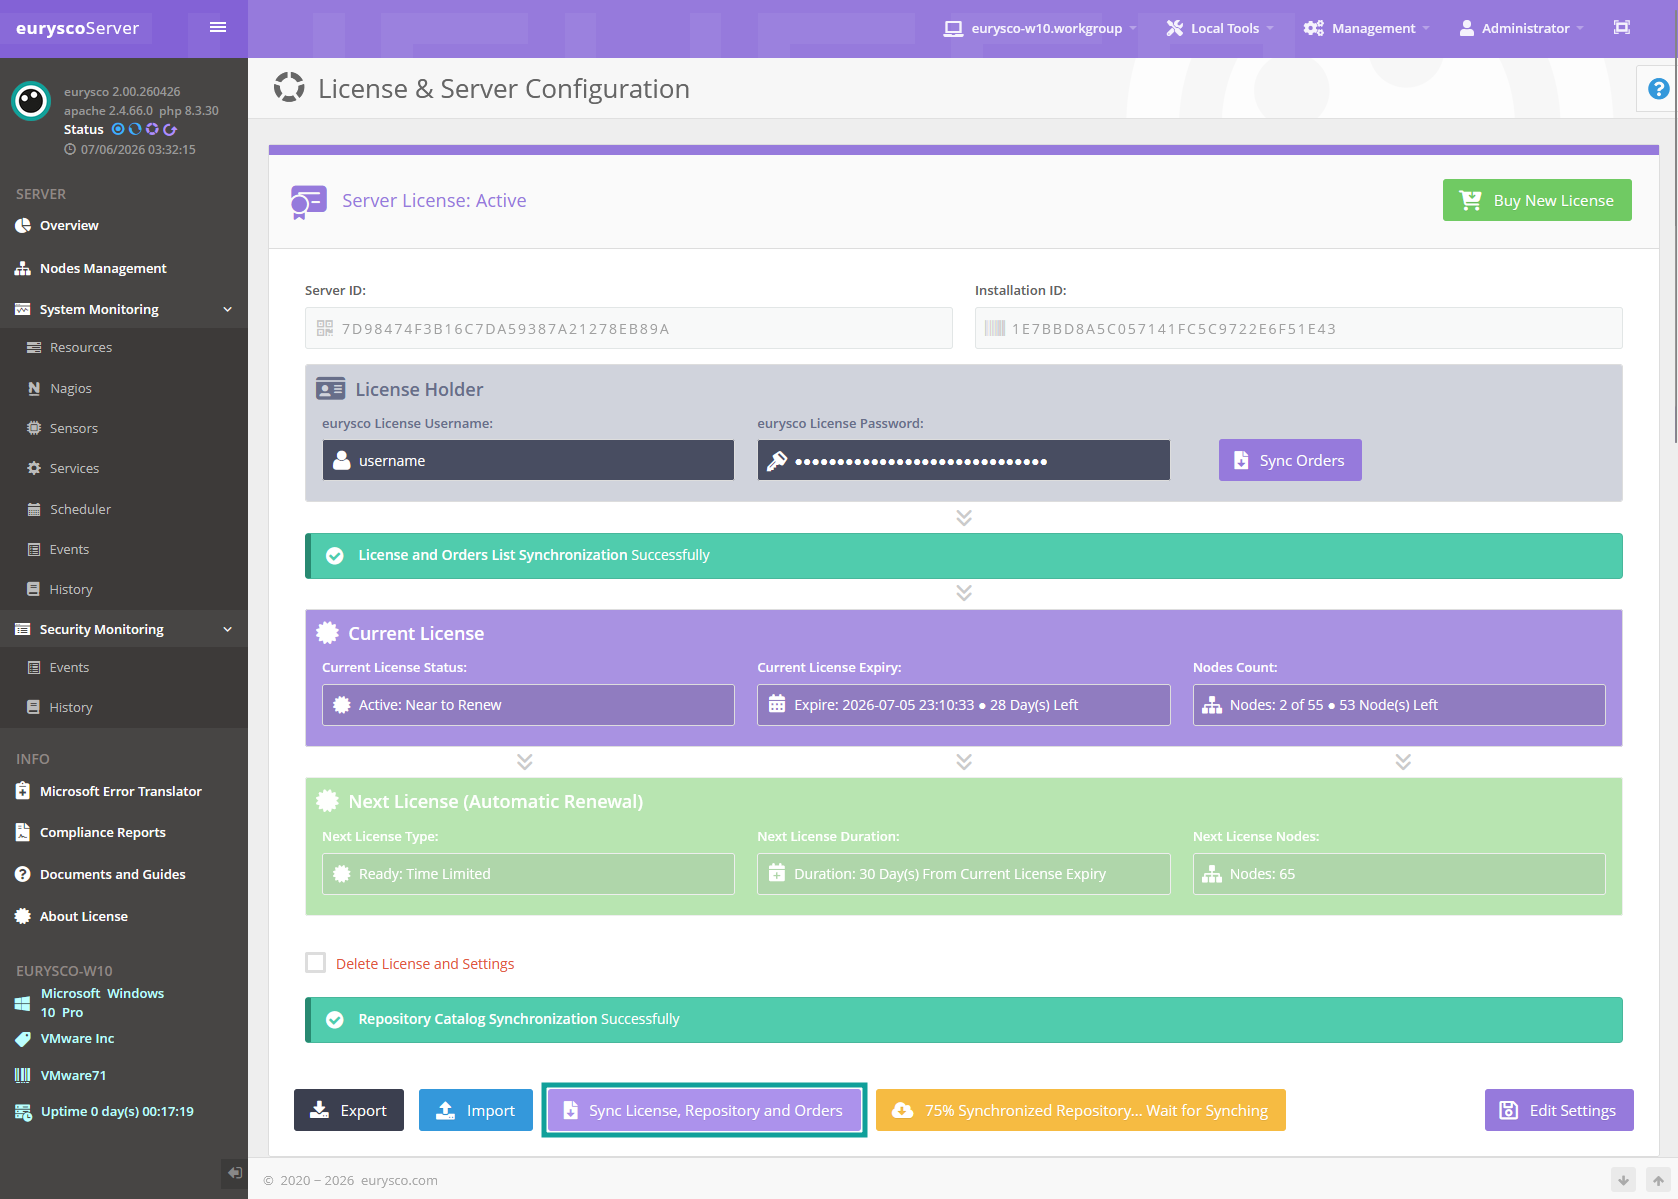
Sync License and Catalog #
After the licenses have been purchased and assigned, by clicking on the Sync License and Catalog button it will be possible to immediately synchronize and activate the license as well as synchronize the installation package repository.
-
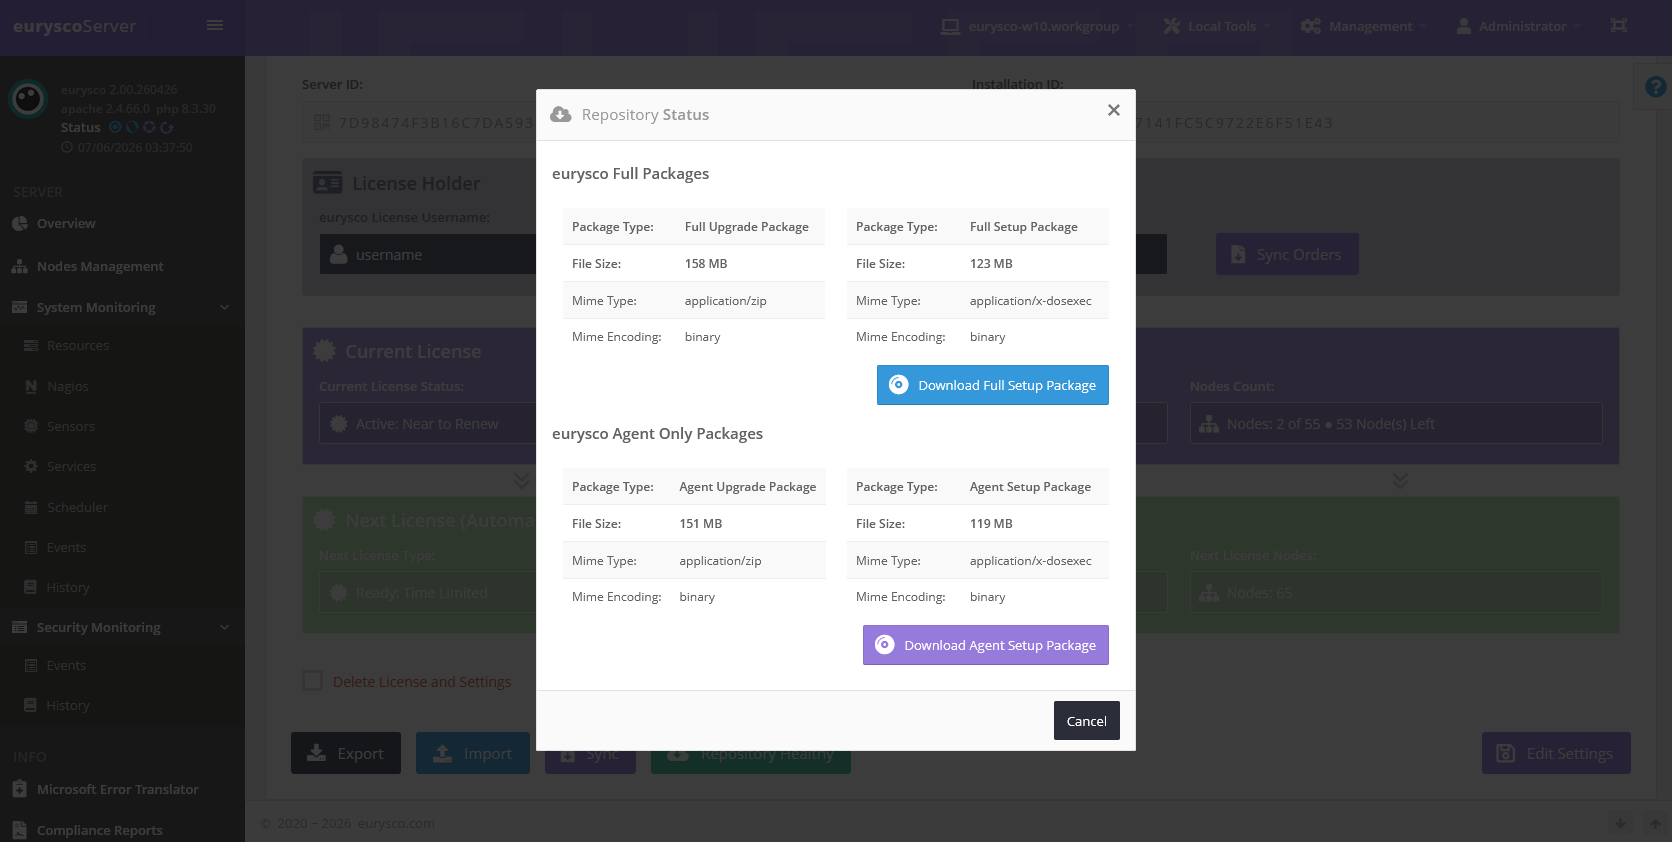
Repository Healthy #
When the synchronization of the repository is complete, the status changes to Repository Healthy and it will be possible to check the detail by clicking on it.

-
Proxy Settings #
The eurysco Server can communicate with the License Servers through a Proxy if required. Open the Proxy configuration interface from the Management – General Settings – Proxy Settings menu by filling in the following fields, saving the settings and testing them with the appropriate Test Proxy button.
Proxy Address: [String Field] Define the URL address of the proxy to be contacted by the eurysco agent.
Proxy Port: [String Field] Define the network communication port of the proxy.
SSL Verify Host: [Select Field: Enable|Disable] Enable the host name verification during the SSL communication handshake process.
SSL Verify Peer: [Select Field: Enable|Disable] Enable the mutual verification during the SSL communication handshake process.
Proxy Type: [Select Field: HTTP/S|SOCKS5|SOCKS4] Select the Proxy type.
Authentication: [Select Field: BASIC|NTLM|GSS-API|NONE] Select the type of authentication required by the proxy.
Username: [String Field] Define the user to authenticate to the proxy if required by the type of authentication.
Password: [Password Field] Define the password of the user to authenticate to the proxy if required by the type of authentication.

-
Connect Using Proxy #
Go back to Server configuration interface from Management – Server Configuration menu and set Connect Using Proxy to Enable by clicking Edit Settings to save the settings. Click on the Sync License and Catalog button to verify correct communication with the License Servers through the Proxy.
